
Power Query can help you summarize and analyze your data. But did you know that you can also add calculated columns similar to how you might in a pivot table? In this post, I’m going to show you how you can compare your values against an average to show a percent change in a new calculated column within Power Query.
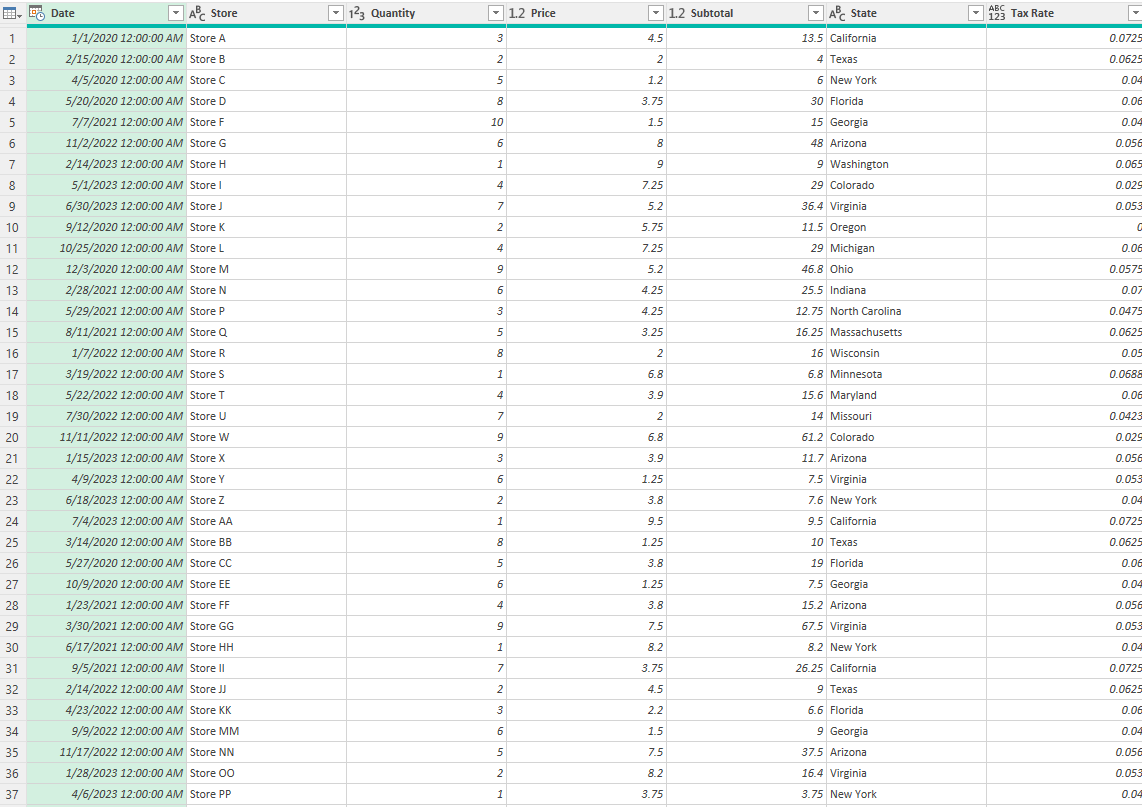
This is the table that I am going to work with for the purpose of this calculation:
Calculating an average from a column in Power Query
Before I create my calculated column, I’m going to create an average that I can compare against in the Price field. Here’s how I can calculate an average:
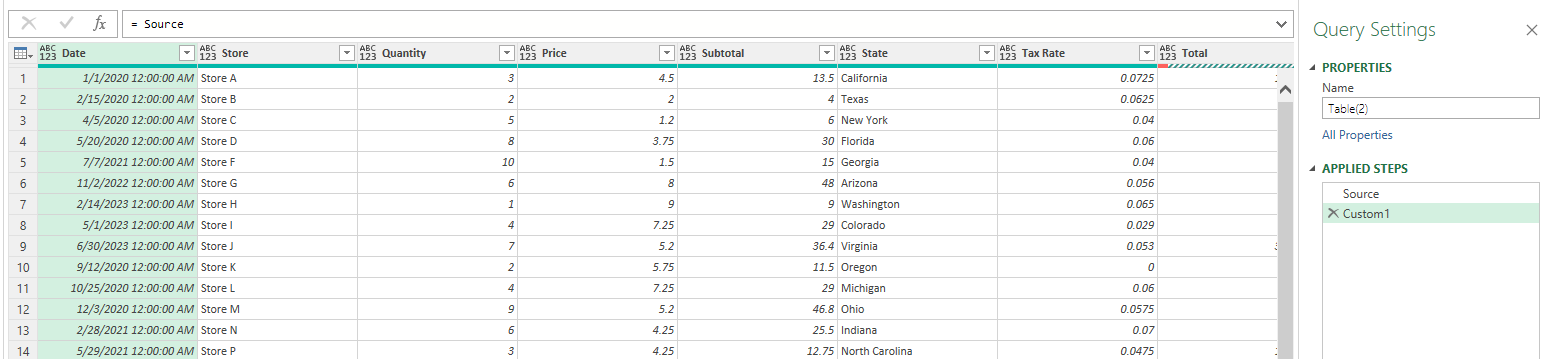
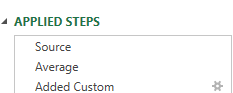
1. Create a new step in Power Query. This can be done by clicking on the fx button next to the formula bar. This will create a new step which will reference your most recent step automatically. Since my first step was just the Source that is what my new step will refer to:
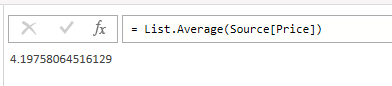
2. Use a List function to perform a calculation on a column. In Power Query, there are many List functions you can use to do calculations. In this example, I want to calculate the average based on the Price field. So my formula will be as follows:
= List.Average(Source[Price])
I have wrapped the Price field within the step that I was referencing (Source) and used that as the argument in my List.Average function. There are other List functions you can use to calculate things like max, min, standard deviations, and other common calculations. This formula now computes the average for that field:
3. Rename your new step. This is an optional step but it is a useful one if you want to reference this value later on. Rather than referencing a ‘Custom’ step, I can right-click on the step and choose to Rename it. Since I’m calculating an average, I’m going to rename it to Average.
Creating a calculated field which compares the percent difference from the average
I’m going to create a calculated column that takes the current price and compares it to the average value that I calculated earlier. Then, I’m going to convert that into a percentage difference. Here are the steps to create a calculated column in Power Query:
1. Add a custom column. Click on the Add Column tab in Power Query and select Custom Column.
2. Enter the formula for the column. You will now be prompted to create your formula and name your new column name. I’ll call this % Difference. And my calculation will take the current value in the Price and divide it by the Average and subtract 1, to get the percentage difference. Here’s what the formula looks like:
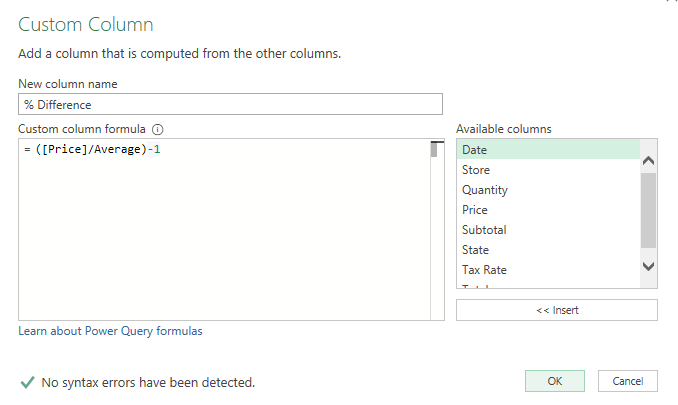
One key thing to note here is that I reference the Average as that is the name of the custom step I created in the previous section. It is saved in my steps and so Power Query is referencing that step in this calculation. If you are referencing a previous step, you will want to ensure it is above your calculated step to avoid running into a circular reference.
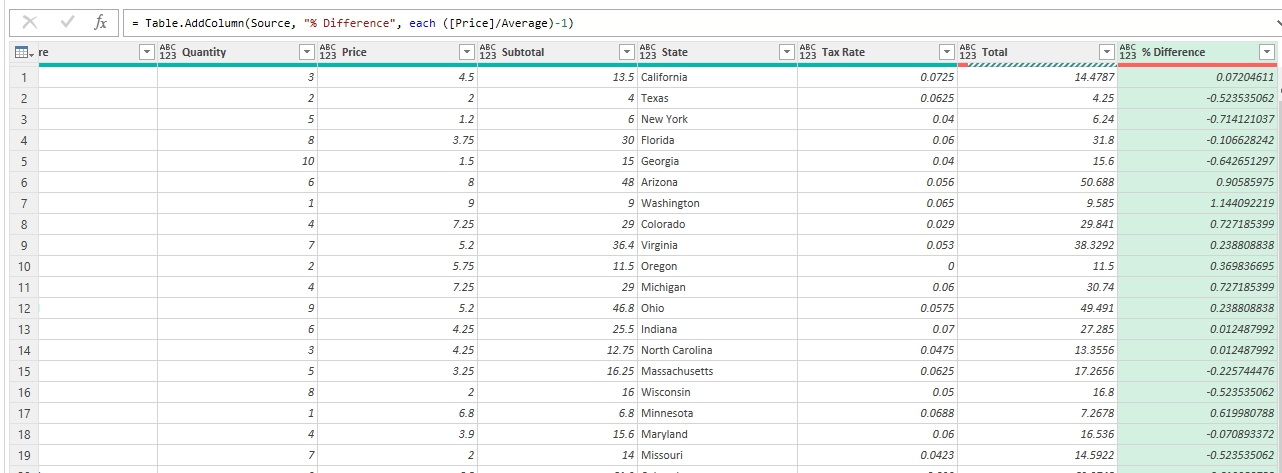
After clicking on OK, Power Query now creates that additional step for me:
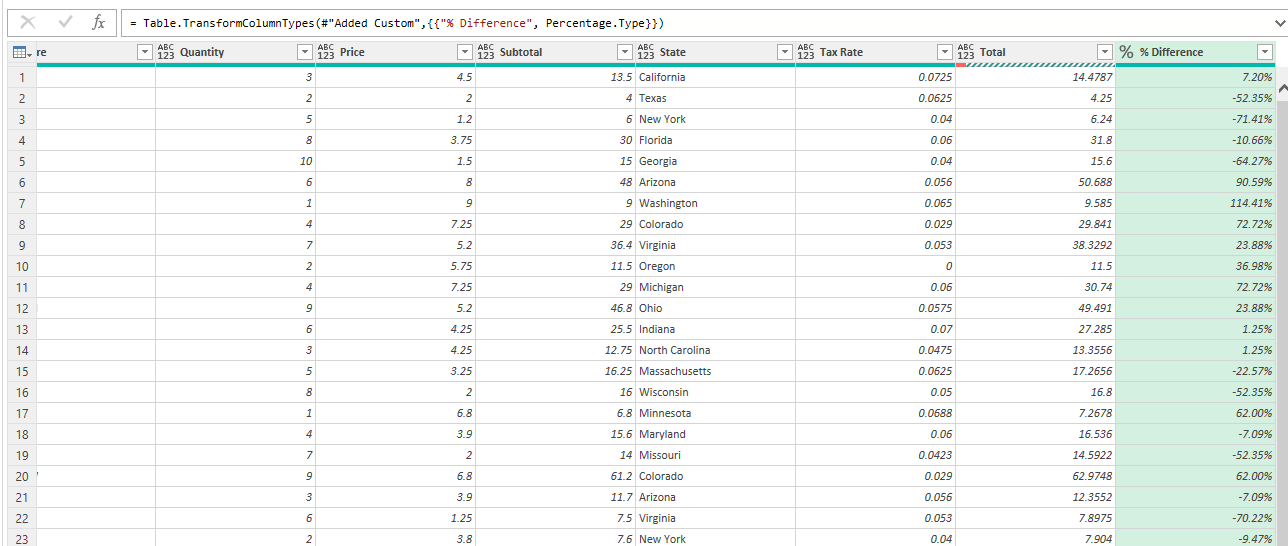
3. Change the format (if necessary). My column has been created but since it is a percentage, I want to change the data type so that it correctly shows a % rather than a decimal number. To do this, I can right-click on the data type (where it shows ABC and 123 underneath), and change that to a percentage. Now my new column correctly displays as a percentage:
For another example of how to run these calculations, refer to the following video:
If you like this post on How to Add a Calculated Column in Power Query, please give this site a like on Facebook and also be sure to check out some of the many templates that we have available for download. You can also follow me on Twitter and YouTube. Also, please consider buying me a coffee if you find my website helpful and would like to support it.