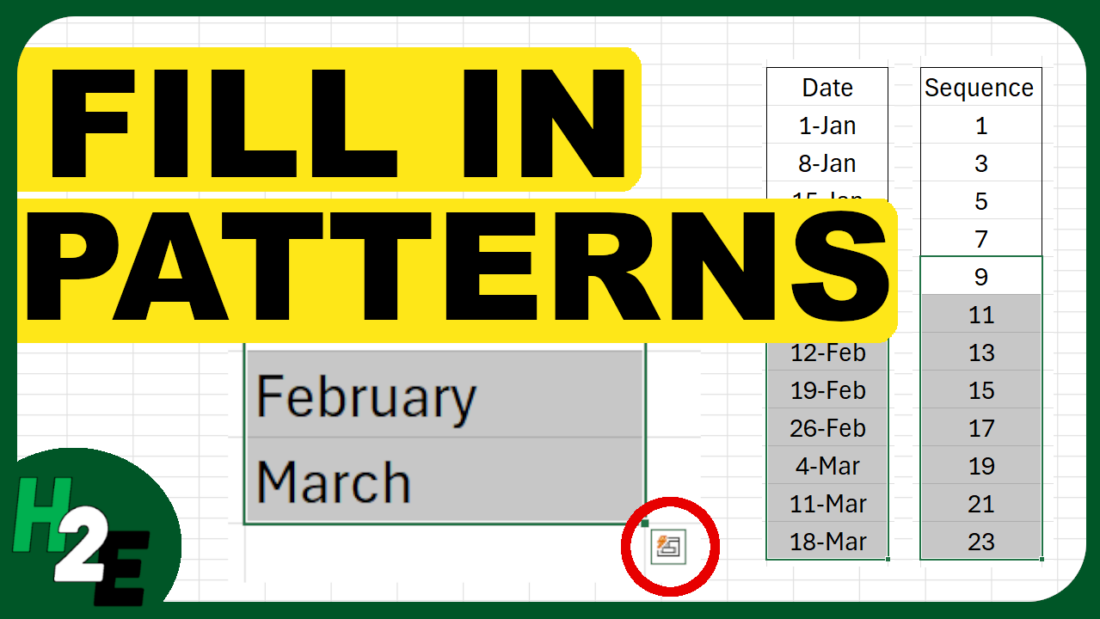
Autofill is one of Excel’s most powerful tools, helping you quickly and efficiently populate cells with data, formulas, or patterns. Whether you’re entering dates, numbers, or repetitive text, learning how to autofill in Excel will save you time and reduce errors.
In this article, I’ll walk through the basics of using Excel’s autofill feature, along with practical examples to help you master this essential tool.
What Is Autofill in Excel?
Autofill allows you to copy or extend data in Excel by dragging the fill handle (a small square in the bottom-right corner of a cell). Excel automatically identifies patterns and fills adjacent cells with the desired data, saving you from manually entering information.
How to Autofill in Excel: Step-by-Step
1. Basic Autofill for Numbers and Text
- Step 1: Enter a value in a cell.
- Step 2: Select the cell. You’ll see a small square (the “fill handle”) in the bottom-right corner.
- Step 3: Hover your mouse over the fill handle until the cursor changes to a black plus sign (+).
- Step 4: Click and drag the fill handle down or across to the cells you want to fill.
- Step 5: Release the mouse. Excel will autofill the cells based on the first value.
In the example below, I’m using the autofill to fill in the remaining months of the year.

2. Autofill a Sequence of Numbers
If you want Excel to create a sequence (e.g., 1, 2, 3…), follow these steps:
- Step 1: Enter the first few numbers in adjacent cells.
- Step 2: Select multiple cells. The more complex the pattern, the more cells you may need to select.
- Step 3: Hover over the fill handle, click, and drag it down or across.
- Step 4: Excel will automatically identify the pattern and fill the cells with the sequence.

3. Autofill for Dates
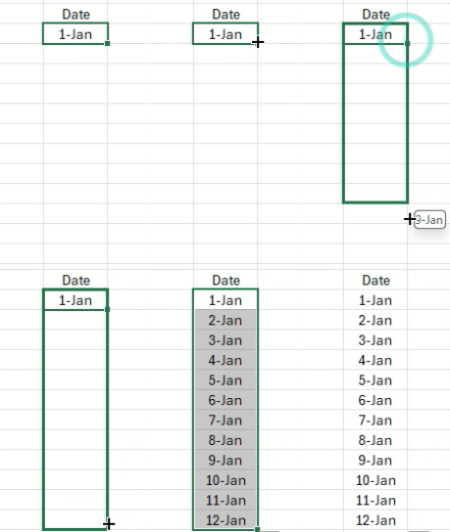
You can quickly autofill dates to save time.
- Step 1: Enter a date in a cell (e.g.,
01/01/2024). - Step 2: Drag the fill handle.
- Step 3: Excel will autofill with consecutive dates.
Custom Intervals:
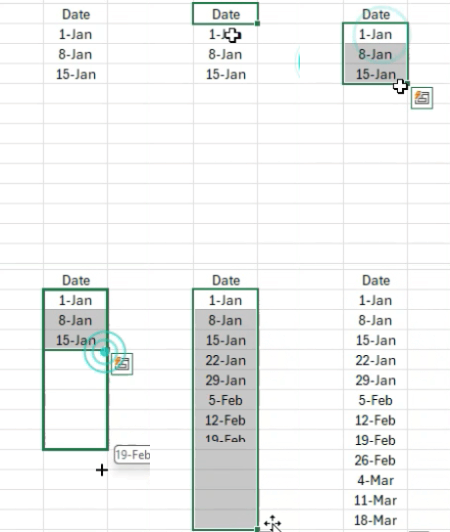
To autofill dates in increments (e.g., every 7 days), follow these steps:
- Enter the first two dates (e.g.,
01/01/2024and01/08/2024). - Select both cells.
- Drag the fill handle to extend the sequence.
4. Autofill Formulas
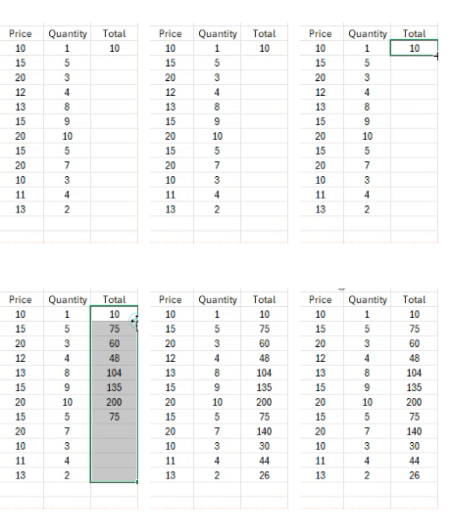
Excel can also autofill formulas for quick calculations.
- Step 1: Enter a formula in a cell (e.g. price x quantity).
- Step 2: Select the cell with the formula.
- Step 3: Drag the fill handle down or across to apply the formula to other cells.
Excel will automatically adjust the cell references and fill in the formulas for you. If there is already data which extends as far down as you need to, you can double-click on the fill handle rather than dragging it down, and Excel will automatically go as far down as the rest of the data.
5. Autofill Custom List
If you frequently use custom lists (like days of the week or month names), Excel can autofill these automatically.
For example:
- Enter
Mondayin a cell. - Drag the fill handle down.
- Excel will autofill with
Tuesday,Wednesday, etc.

Tip: You can create your own custom lists:
- Go to File > Options > Advanced.
- Scroll down and click Edit Custom Lists.
- Add your list, save it, and use autofill as usual.
How to Autofill Without Dragging
If you have a large dataset, dragging the fill handle can be time-consuming. Here’s how to autofill using shortcuts:
- Enter the value or formula in the first cell.
- Select the range you want to fill (including the starting cell).
- Press Ctrl + D to autofill down or Ctrl + R to autofill right.
Common Autofill Issues and Solutions
- Problem: Autofill copies the same value instead of creating a sequence.
- Solution: Enter the first two values of the sequence and drag again.
- Problem: Autofill doesn’t recognize a pattern.
- Solution: Double-check your entries and use clear patterns like
2, 4, 6orMonday, Tuesday.
- Solution: Double-check your entries and use clear patterns like
- Problem: Fill handle is missing.
- Solution: Go to File > Options > Advanced and ensure the “Enable fill handle” option is checked.
If you like this post on How to Autofill in Excel: A Step-by-Step Guide, please give this site a like on Facebook and also be sure to check out some of the many templates that we have available for download. You can also follow me on Twitter and YouTube. Also, please consider buying me a coffee if you find my website helpful and would like to support it.

