Have you ever stared at a complex business problem in Excel, wondering what the best possible solution is? You might be trying to maximize profit, minimize costs, or hit a specific target, but you have a long list of limitations — like a budget, time limits, or resource constraints.
Instead of manually changing numbers for hours (doing a what-if analysis), you can use Excel’s Solver.
Solver is a powerful add-in that finds the optimal solution for a problem by adjusting a set of input cells while taking into account a set of rules and constraints you define. It’s like Goal Seek on steroids: while Goal Seek finds a single input for a single output, Solver can juggle multiple inputs and complex limitations all at once.
Here’s how to get started.
Step 1: First, Enable the Solver Add-in
By default, Solver isn’t visible on the ribbon. You need to “turn it on” first.
- Go to File > Options (at the very bottom).
- In the Excel Options window, click on Add-ins from the left-hand menu.
- At the bottom of the window, see the “Manage:” dropdown. Make sure it says Excel Add-ins and click Go…
- A new, smaller window will pop up. Check the box next to Solver Add-in and click OK.
You will now see a new Solver button on the far-right-hand side of your Data tab.
Step 2: Understand the 3 Key Parts of the Solver Equation
Before we build our example, you need to know the three components Solver works with.
- Objective Cell (The Goal): This is one single cell that you want to optimize. It must contain a formula. You’ll tell Solver you want to make this cell’s value:
- Max (e.g., maximize total profit)
- Min (e.g., minimize total cost)
- Value Of (e.g., hit a target sales number of exactly $1,000,000)
- Variable Cells (The Levers): These are the cells that Solver is allowed to change to reach your objective. These are your “decision” cells, like the number of units to produce, the amount of money to invest, or the hours to assign to a project.
- Constraints (The Rules): These are the rules and limitations that restrict your variable cells. They ensure the solution is realistic. For example:
- “We can’t spend more than our $10,000 budget.”
- “We must produce at least 50 units.”
- “The number of hours worked can’t be negative.”
- “The number of units produced must be whole numbers (integers).”
Step 3: Set Up Your Model & Run Solver (Example)
Let’s use a classic business problem. Imagine we run a small bakery that makes two products: Cakes and Cookies. We want to find the perfect product mix to maximize our total profit.
Part A: Prepare the Model in Excel
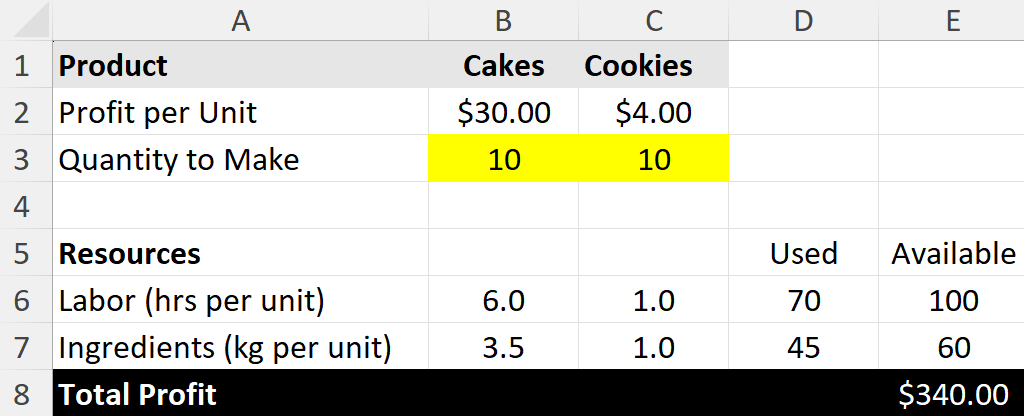
Here’s an example of what the data might look like.
First, set up your data like this. The yellow cells (B3 and C3) are the Variable Cells (the ones we’ll tell Solver to change). The total profit cell (E8) is our Objective Cell. Right now, we’re making an equal number of cakes and cookies, but our resources are underutilized.

Key Formulas:
- Total Profit (E8):
=B3*B2+C3*C2 - Labor Used (D6):
=B3*B6+C3*C6 - Ingredients Used (D7):
=B3*B7+C3*C7
Right now, making 10 cakes and 10 cookies gives us a profit of $340. But are we using our resources well? Can we do better? Let’s ask Solver.
Part B: Use the Solver Dialog Box
- Click the Data tab and click the Solver button. The main dialog box will appear.
- Set Objective: Click in the box, then click cell E8 (our Total Profit cell). Select the Max radio button.
- By Changing Variable Cells: Click in this box. Select cells B3:C3 (the “Quantity to Make” for both products).
- Subject to the Constraints: This is where we add our rules. Click the Add button.
- Constraint 1 (Labor): Cell Reference: D6 (Labor Used) <= Constraint: E6 (Labor Available). Click Add.
- Constraint 2 (Ingredients): Cell Reference: D7 (Ingredients Used) <= Constraint: E7 (Ingredients Available). Click Add.
- Constraint 3 (No negative products): Cell Reference: B3:C3 >= Constraint: 0. (We can’t make negative cakes). Click Add.
- Constraint 4 (Integers): Cell Reference: B3:C3 = integer (This forces Solver to find whole numbers, as we can’t sell half a cake). Click OK.
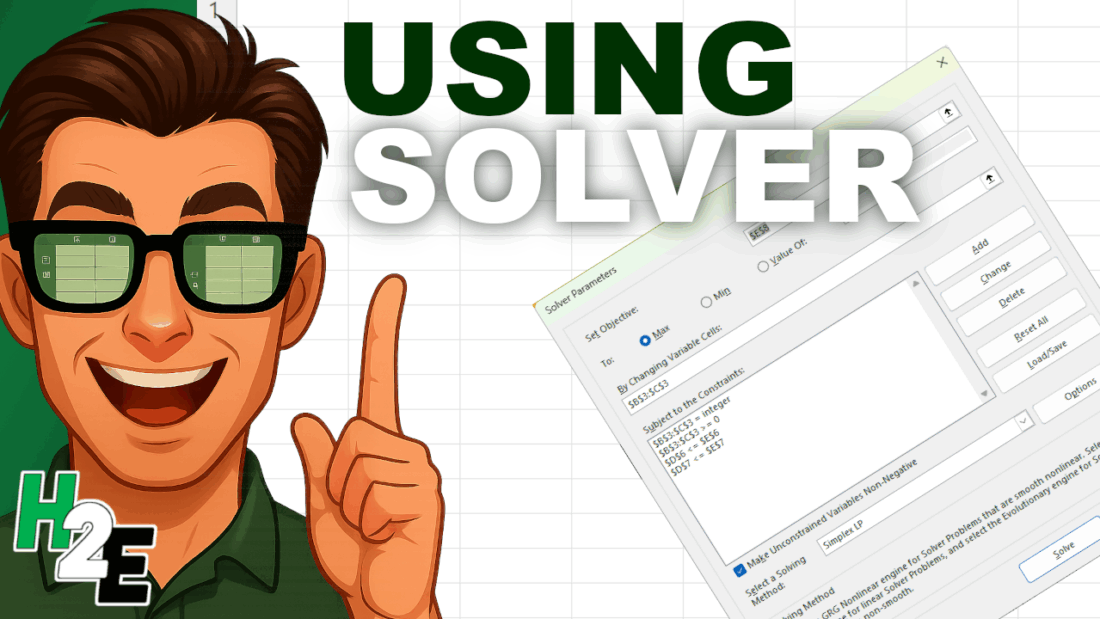
Your Solver window should now look like this:

- Make sure “Make Unconstrained Variables Non-Negative” is checked (it’s good practice).
- Select a Solving Method: For simple problems like this, Simplex LP (Linear Programming) is the best and fastest choice.
- Pro-Tip: Always try Simplex LP first. If Excel tells you the problem isn’t linear, try GRG Nonlinear next. Use Evolutionary as the last resort when your model is truly complex and non-smooth.
- Click Solve!
Part C: Get the Answer
Solver will run for a moment and then a new window will pop up, “Solver Results.”

Solver found a solution. All constraints and optimality conditions are satisfied.
This is great news! You can see the solution in the background. Excel has changed your Variable Cells (B3 and C3) to the optimal numbers.
- Quantity to Make (Cakes): 16
- Quantity to Make (Cookies): 4
This new mix gives us a total profit of $496 (cell E8), which is better than our initial $340 guess, and it perfectly uses all 100 hours of labor and all 60kg of ingredients.

Click OK to keep the solution.
When Should You Use Solver?
Solver is incredibly versatile. Use it any time you need to find the “best” answer while balancing limitations.
- Finance: Find the optimal investment portfolio to maximize returns for a given level of risk.
- Operations: Create a production schedule that minimizes cost while meeting all customer orders.
- Staffing: Design a weekly staff schedule that meets shift requirements with the fewest employees.
- Marketing: Allocate an advertising budget across different channels (TV, digital, radio) to get the maximum exposure without exceeding the total budget.
If you liked this post on How to Use Solver in Excel: A Simple Step-by-Step Guide, please give this site a like on Facebook and also be sure to check out some of the many templates that we have available for download. You can also follow me on X and YouTube. Also, please consider buying me a coffee if you find my website helpful and would like to support it.

