
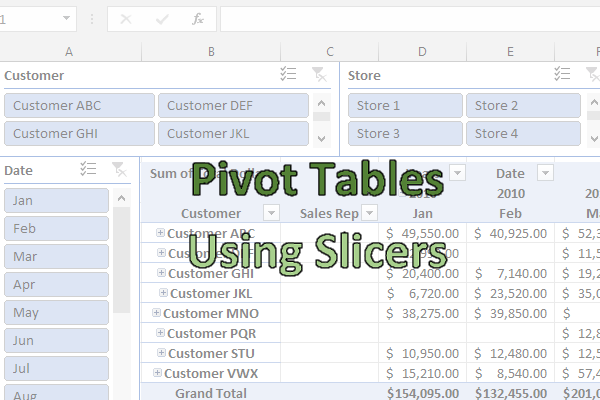
I am going to use the same pivot table that I left off with in my last post and now I am going to add slicers to show you how they can make your life easier.
***Please note slicers are a new feature in Excel 2010 and you will not be able to use them on older versions***
To insert a slicer is very simple, while having selected a cell on your pivot table, go to the Insert tab and click on Slicer.
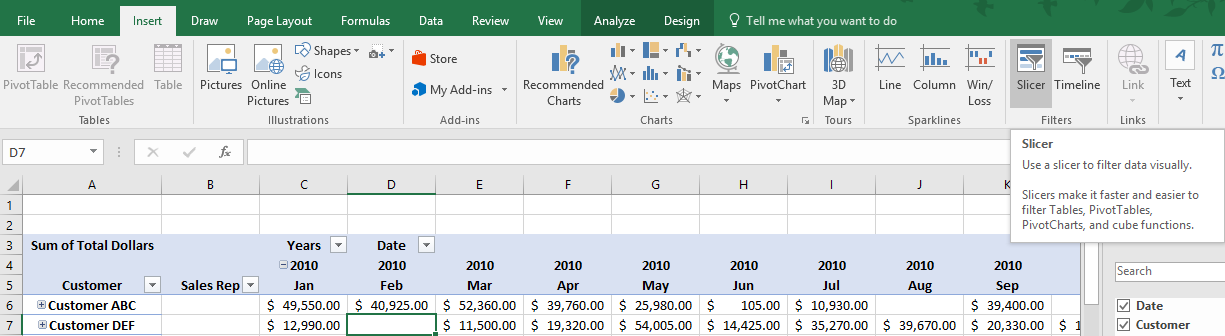
Then you will be prompted to select which field you want to use a slicer for:

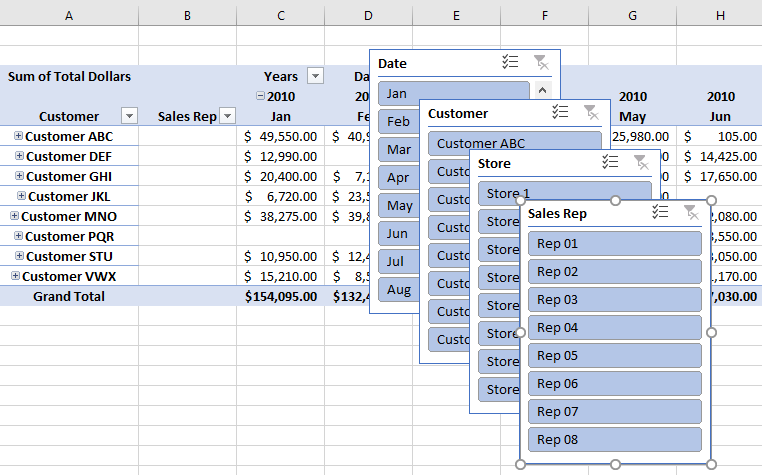
This is of course not ideal, so the first thing you will want to do is move them. You can easily re-size the slicers as you see the current one I have selected for Sales Rep shows circles along the edges that I can use to re-size it.
First what I am going to do is insert a column into column A so that my pivot table pushes over into the next column. I will also insert a few rows above it to make room as well.
I am doing this so it is easier to move over a slicer to the left of the pivot table.
For slicers that have long filters (for example customer names), I prefer to put those above the pivot table, otherwise the names might get cut off. For shorter names, such as the three letter month abbreviations, those can go into the column to the left of the pivot table. Because they are short, they won’t need a big column to accommodate them. However, this is just my preference and you can put slicers wherever you think is most convenient.
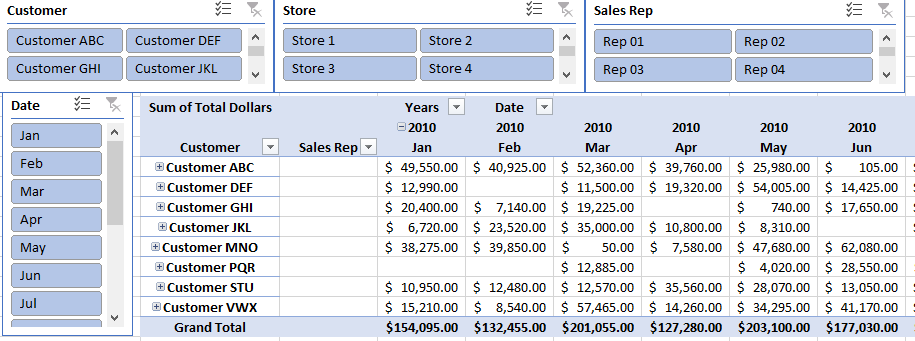
I’ve re-arranged my slicers so the months are to the left of the pivot table and everything else is above it:

The slicer to the left of my pivot table looks fine, but the problem is the slicers at the top only show a couple items each, and would require me to scroll to find my selection. You may need to scroll, but there is a lot of empty space that can be used otherwise.
What I want to do is add another column in the slicer. If I select the Customer slicer, under the Options tab under the Slicer Tools section, on the right-hand side there is a field for columns. The default is set to 1, but if I change it to 2 my slicer now looks like this:
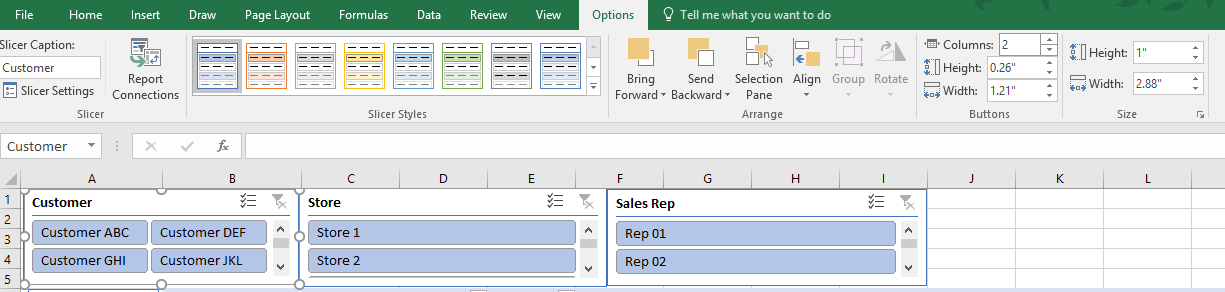
This is already a big improvement since now instead of seeing just two items I see four. I can add more columns but in this case without expanding my slicer horizontally it will truncate the names. You can stretch out the slicer as you see fit and adjust the columns accordingly. After adjusted my slicers all to be two columns, my pivot table and slicers now look like this;
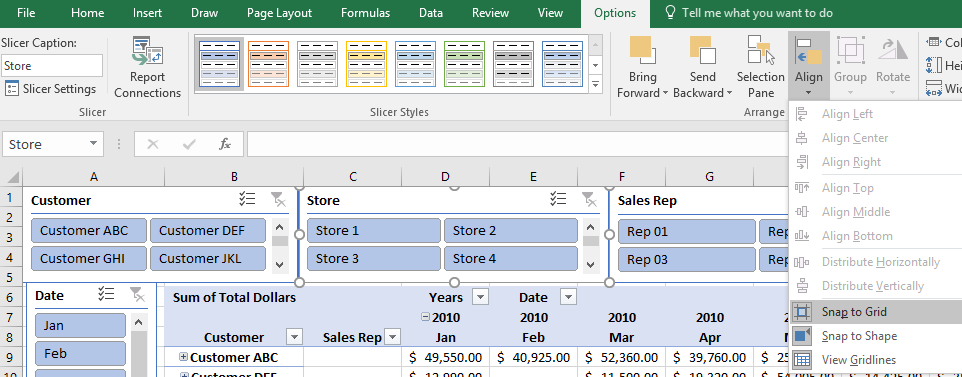
If you are finding it hard to line up your slicers so they are even, select the slicer and under Slicer Tools and Options, click the Align button and check off Snap to Grid and Snap to Shape. Doing this will make it easier for your slicer to lock on to other slicers and make it easier to line them up. Do this for each slicer you are having issues lining up. Or you could select all your slicers (using ctrl) and apply the settings to all of them at once.
Now that the slicers are setup they are ready to use. Slicers effectively are filters in a pivot table, but the key difference is their ease of use for any user.
Whatever options I want to filter by I can just click on in the individual slicers. In the below example I am going to select all the sales to Customer ABC and Store 1 for Rep 01. My selections below reflect these selections and now my data table has filtered this data out:

If I want to remove any filters then all I can just click on the filter icon and the red x in the top right corner of the filter. This will reset the selections for that slicer.
Based on my selections I cannot choose any option besides Oct for the Date slicer. This is because based on the criteria I have selected in the other slicers there are no other months that are available. The unavailable selections are indicated by the faded light blue selections.
[…] when learning how to create a pivot table in excel. There are more complex items and you can look here for how to use slicers and here for how to make a […]
[…] The slicer shows the number of items selected and as you can see, it only has the sales reps that I selected in the data. You can add more slicers for other columns but the process remains the same. The big difference you can see from Excel is that your selections are how you’d make the selections in a normal filter; you don’t have buttons for each slicer option the way you do in Excel. […]