H2EMapChart-min

How to Make a Map Chart in Excel

If you’re creating a dashboard or just want to visualize your data by what part of the world it’s coming from, a map chart can be a great way to accomplish that. Below, I’ll show how you can use a map chart to show data points at regional and global levels. And while you technically can’t use them with pivot tables, I’ll show you how you can use slicers to seamlessly drill down and dynamically update your chart.

Creating a global map chart

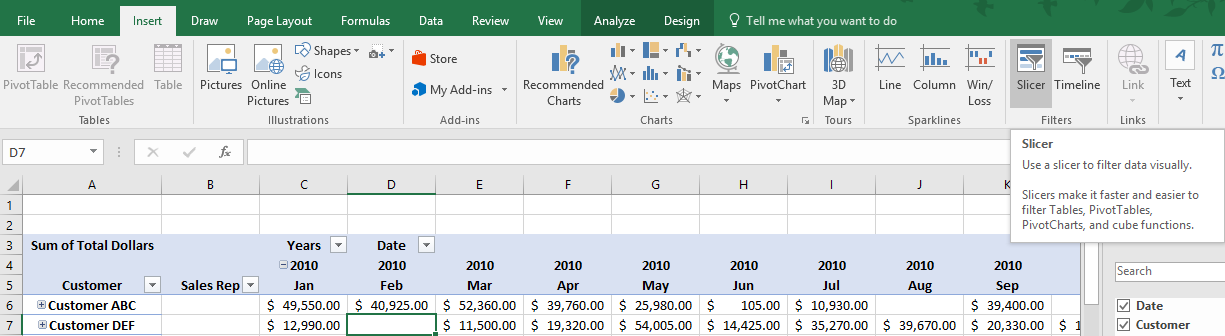
It should be easy to tell if the map chart is available on your version of Excel as the Maps icon stands out in the chart section:

Default chart options on the insert tab.

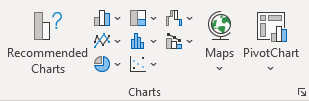
If you see the maps option, then you have a compatible version to work with.

To set up the data to work with the maps chart all you need is a simple table that shows a location along with a value. In this example, I’ll focus on different country data. My data set shows the GDP per capita (in U.S. dollars) by country, courtesy of the World Bank. Here’s what a glimpse of what it looks like:

GDP per capita by country in U.S. dollars.

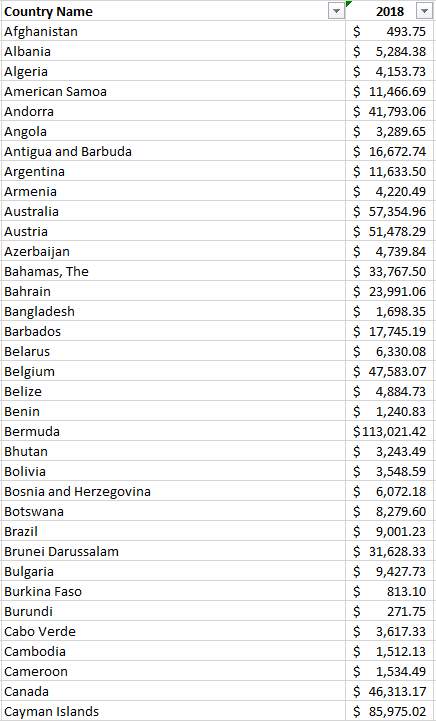
This table doesn’t look terribly great in text and it’s an ideal thing to visualize on a map. As long as your data looks like this and the country names are correct, you can just select this data set and go to insert the map chart, and you’ll get something that looks like this:

GDP per capita by country on a map.

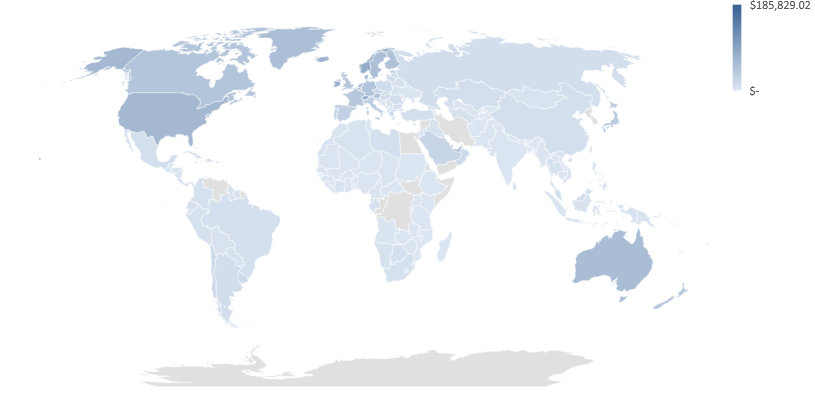
As you can see, the dark blue parts of the world have the highest GDP per capita while the lowest shades are on the bottom end of that scale. And the areas in grey do not contain data.

The map automatically adjusts based on how many countries you have included in your data set. If I only include data for Canada, the U.S., and Mexico, my map looks like this:

Map chart showing only North America.

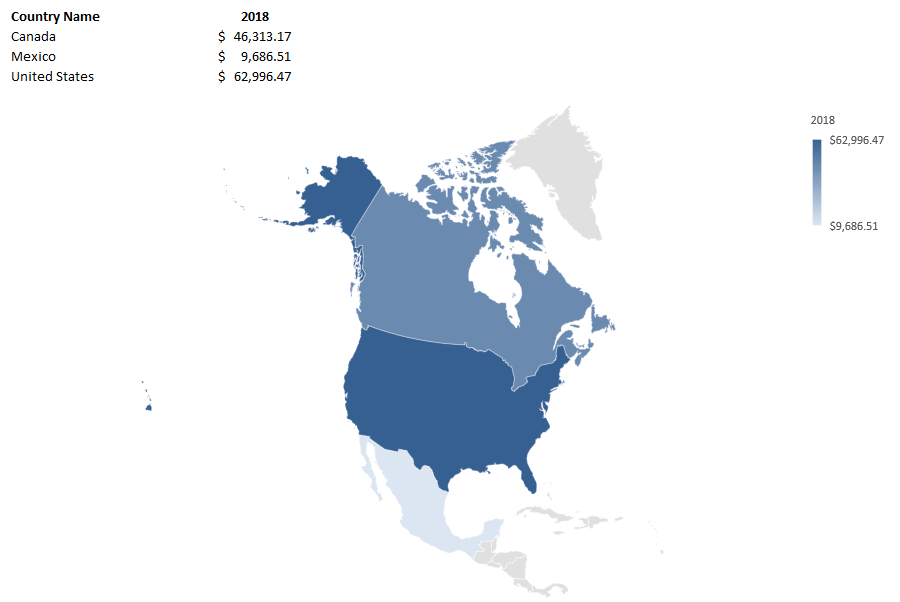
One of the cool things is you can really zero in on specific regions depending on your data set.

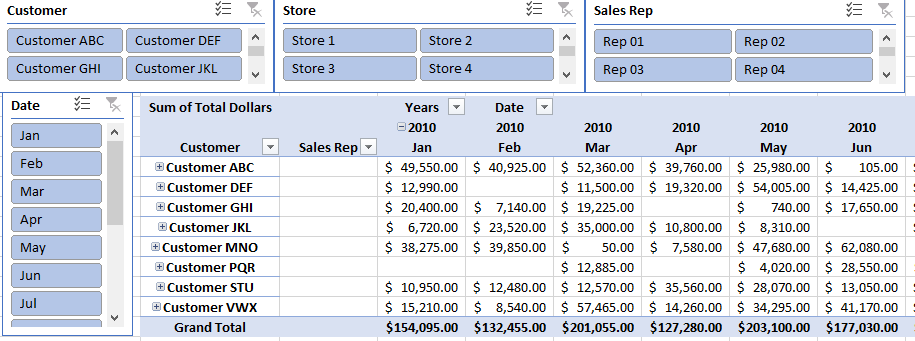
The one thing you might be disappointed to learn is that this type of chart does not work with pivot tables. But in the next section, I’ll show you how you can still drill down on the data and the chart using slicers.

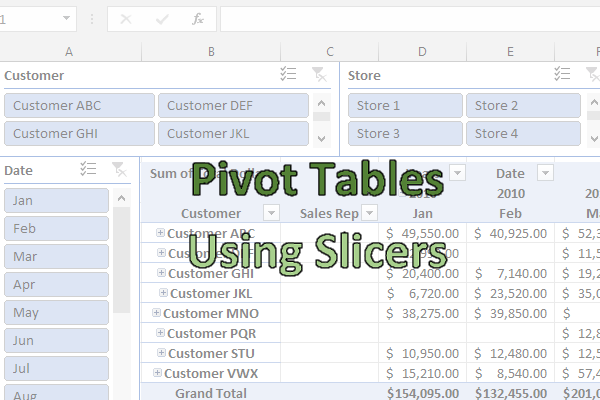
Using slicers to break down the data

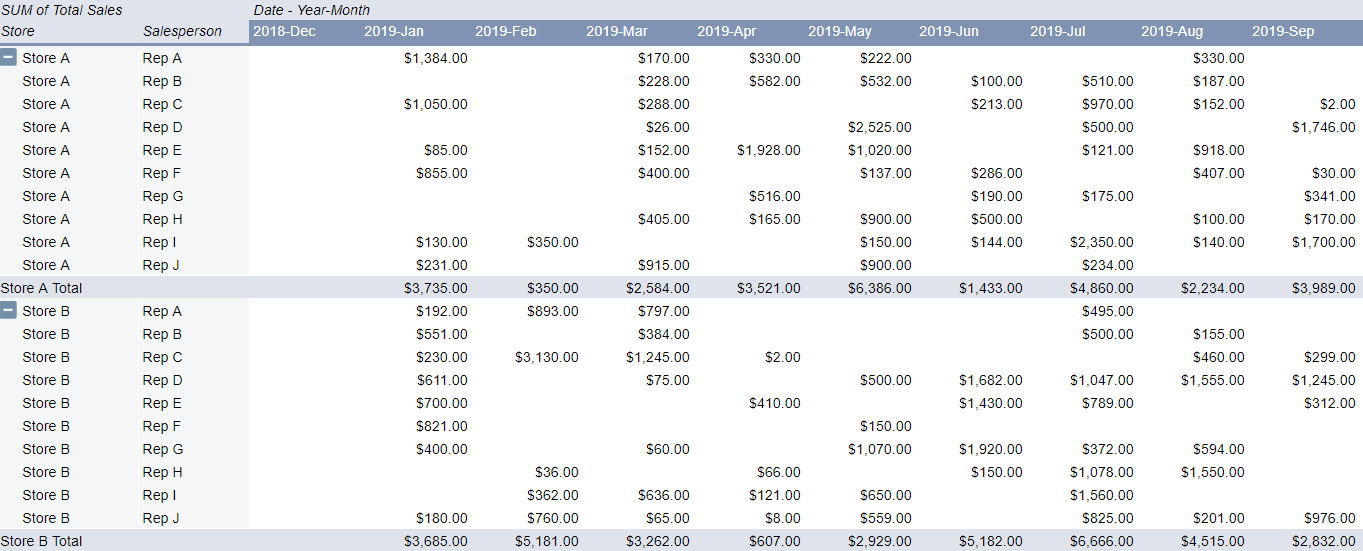
Using data from the Bureau of Economic Analysis, I downloaded data for per capita income by county in the U.S., below is what the table looks like:

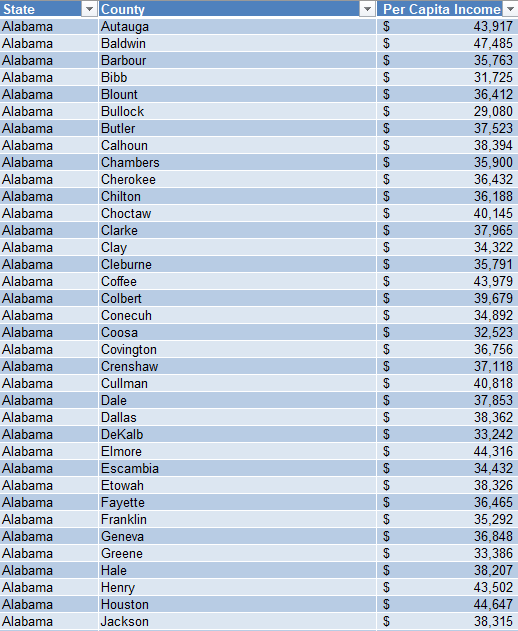
I had to do a bit of cleaning up the data to ensure that every line contained the state. And it’s also important to convert this into a table so that slicers will work with it.

With the maps chart, one of the things you’ll notice is you need to provide enough of a trail for Excel to be able to determine which location you are referring to. Cities, for example, could have the same names in multiple states or countries. And that’s why whether you’re looking at counties or cities, the more information you provide Excel, the more likely the chart will come out as you want it to.

When you first create a map chart it may not look as you expect it to as it could get the categories all wrong, especially if you have multiple fields. You’ll want to make sure that your series and categories are correctly set up if something looks off.

Under the Series, you should only have your values, such as in my example where it only contains per capita income:

Legend entries set up on a map chart.

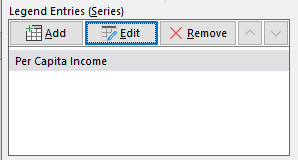
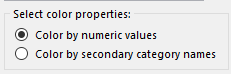
If there’s anything else in there, you may need to delete it and adjust your range. And for your values to show up as a scale (which I’d recommend, otherwise you’ll see a big legend with many colors), you’ll want to edit the legend and make sure the following option is selected:

Selecting color by numeric values in Excel legend for a map chart.

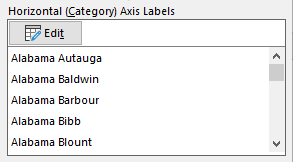
You may also need to adjust the Horizontal Axis to ensure it includes all of your category columns. Again, this is if your map doesn’t look correct and the regions aren’t showing up correctly. Here is how my horizontal category axis looks like, showing both state and county:

Horizontal category axis in Excel for a map chart showing state and county data.

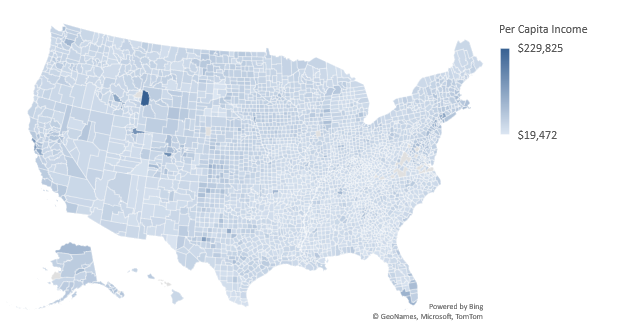
If it’s all set up correctly, your map chart should look something like this:

A map chart that shows per capita income by county.

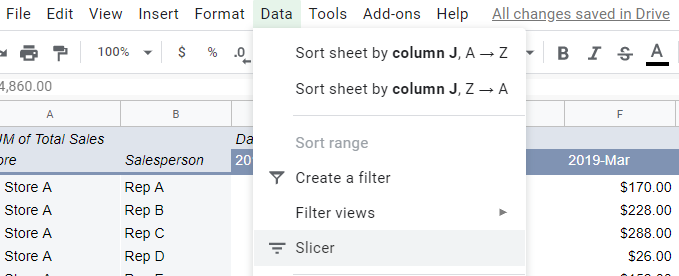
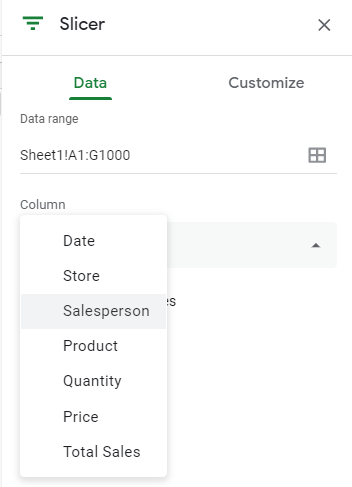
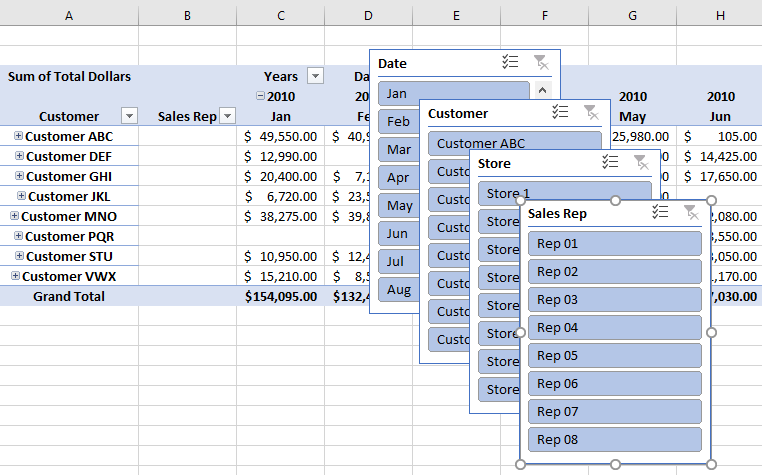
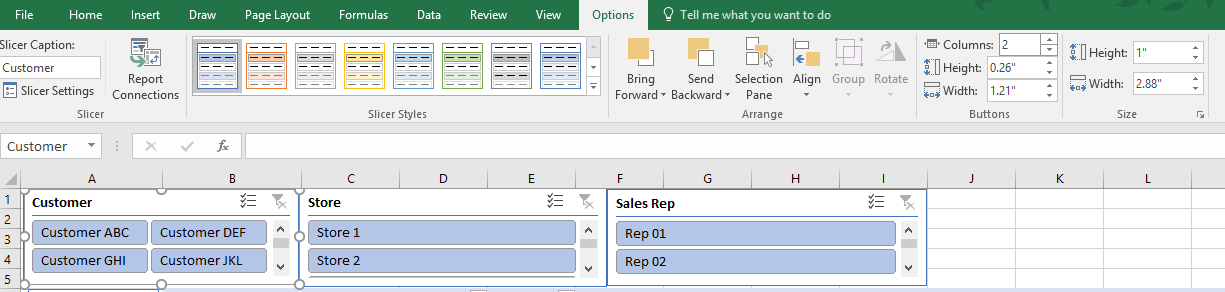
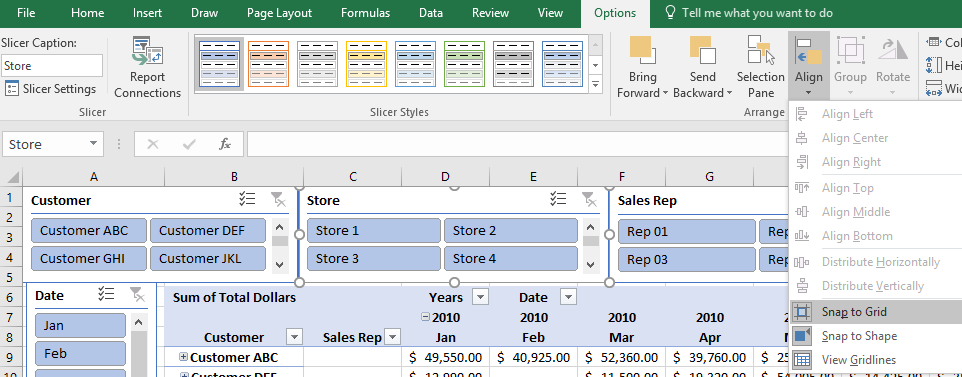
Now, because this is county-level data, it’s not easy to conceptualize what you’re looking at. But with the help of slicers, you can easily jump to different states. Since the data is in a table, you can add a slicer for the state. If you’re not familiar with how slicers work, check out this post. Although that’s for pivot tables, they’ll work the same within a table.

Once the slicers are in place, you can easily jump through and toggle between the different states. Doing so will automatically adjust your map chart which will now focus in on that specific state, just like when it narrowed in on North America when I only had data for three countries:

Map of Washington showing country per capita income.

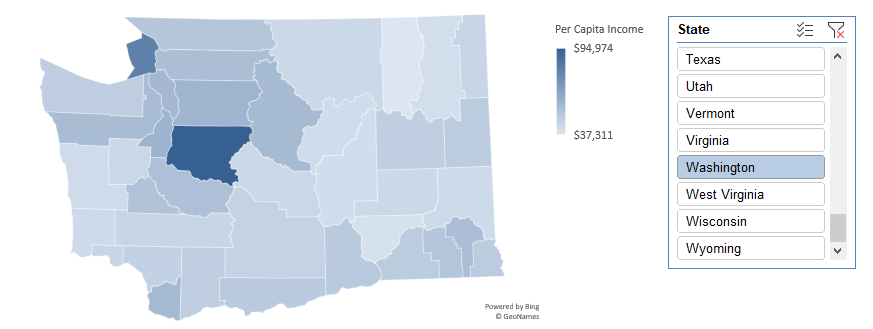
Just like with any other chart, you can hover over and see what the values are and the name of the county.


If you liked this post on how to make a map chart in Excel please give this site a like on Facebook and also be sure to check out some of the many templates that we have available for download. You can also follow us on Twitter and YouTube.

google sheets pivot table slicers

How to Make a Pivot Table in Google Sheets with Slicers

Google Sheets has come a long way in being a formidable alternative to Excel. While it may not have all of the same features as Excel, Google is adding to its functionality. Creating a pivot table with slicers is now a possibility in Google Sheets, and below, I’ll show you how you can do that with the online spreadsheeting program.

The basics: creating a pivot table in Google Sheets

To create a pivot table in Google Sheets involves about the same steps as it does in Excel: compiling and organizing your data set, and then creating the pivot table. Here’s a quick look of my sample data that I have ready to use:

spreadsheet data in google sheets

Then, on the Data menu, select the option to create Pivot Table:

creating a pivot table in google sheets

The next step is selecting where you to put your pivot table:

Menu to select where to create the new pivot table.

The default, a new worksheet, will often work the best. Although the layout looks a little different, the process remains the same with a blank pivot table being your starting point:

new pivot table created in google sheets

On the right-hand side of the page, you’ll see options to put fields into columns and rows, which is what you’re used to with Excel. Again, the main difference is the layout but the logic remains the same:

adding fields to a pivot table in google sheets

When clicking on the Add button, you’ll see options as to which fields to add, even having the option for a calculated field as well:

Adding a field to the values section of a pivot table on google sheets.

In my example, I’m going to select Total Sales so that I can summarize my data based on sales:

sales total pivot table

Next up, let’s add fields for both the row and column sections of the pivot table. If you have a lot of dates in your data set, you’ll want to put the field into the Row section. Otherwise, Google Sheets may give you an error where there are too many columns.

Even if you want to use dates in the column section, you’ll better of first putting it under Rows. Then, right-click on one of the dates and select Create pivot date group:

Google Sheets create pivot date group

From here, you can group your dates so that you don’t have too many entries. In my example, I’m going to use Month as my breakdown. After that, I can move the Date field back into the Column section:

Google sheets pivot table with column and row data

The problem here is that even if you have multiple years, it’ll group it into the same month. For example, I have one entry for Dec. 31, 2018, and it has not separated that out from the 2019 values. In order to fix this, I need to change the grouping from Month to Year-Month. Then my pivot table looks as follows:

Google Sheets pivot table with year month breakdown

Now the data from December 2018 is broken out. Next up, I’ll add another field for the Row section. Here, I’ll add the Store field. And now my pivot table is looking more like what I’d expect it to:

Google Sheets pivot table row and column data filled in.

Next, let’s also add the Salesperson field as well so that we have more of a breakdown:

Google Sheets pivot table with multiple columns and rows.

One of the things that stands out right away is that in Google Sheets the layout of the pivot table is much more intuitive. One of the annoyances of pivot tables in Excel is they’re not in a tabular format by default. With Google Sheets, it’s not something you need to worry about.

It still doesn’t have the repeating rows for the Store field, but that’s a quick fix: simply click the option to Repeat row labels:

Repeat row labels option in Google Sheets is easily accessible within the field settings.

And then, voila:

google shets pivot table with multiple columns and rows

Just like with a regular pivot table you can also drill down into the individual cells to the detail. In Google Sheets, it also gives you a specific name as to what cell you’ve drilled down on, making it easier to refer back to when looking at many different tabs:

Google Sheets new tab name for drill down pivot table results.

Adding slicers to the pivot table

You can also add slicers to your pivot table to make it easier to make changes to it and update it on-the-fly. To add a slicer, just click on the Data tab while you’re on the pivot table and click on Slicer:

adding a slicer to a pivot table in google sheets

Then that will generate the slicer, where you’ll be prompted to select a column to filter by:

Click on the filter icon and then on the right-hand side you’ll see the option to select a field from a drop-down list. In this example, I’m going to select Salesperson:

adding a slicer to a pivot table in google sheets

Then, on the slicer you can filter by the values in the column:

selecting the values to filter in a slicer in google sheets

If I hit the clear button and select only Rep A, Rep B, and Rep C, this is what my pivot table now looks like:

google sheets pivot table filtered by a slicer

The slicer shows the number of items selected and as you can see, it only has the sales reps that I selected in the data. You can add more slicers for other columns but the process remains the same. The big difference you can see from Excel is that your selections are how you’d make the selections in a normal filter; you don’t have buttons for each slicer option the way you do in Excel.

There are changes that you can make to the font and color of the slicer but other than that, visually, there aren’t many changes to make. So if you’re looking to replicate a similar Excel-type dashboard in Google Sheets with many options available for how slicers look then you may be disappointed here. However, in terms of functionality, the slicers work in much the same way that they do in Excel.

A good start, but Google Sheets is still lacking

Google Sheets still has a ways to go in being a real replacement for Excel. While it does have some unique functions that Excel doesn’t, adding pivot tables and slicers is a significant step forward.

However, one area that still needs more improvement is charting. For instance, creating a chart from the pivot table is not an easy task and doesn’t look like Google Sheets is designed yet to create easy-to-use pivot charts. And until that happens, there’s still going to be a big gap between the type of dashboard you can create with Google Sheets and what you can make in Excel.

The good news is that Google Sheets has made a lot of progress and it’ll likely be even better in the future.


If you liked this post on How to Make a Pivot Table in Google Sheets with Slicers, please give this site a like on Facebook and also be sure to check out some of the many templates that we have available for download. You can also follow us on Twitter and YouTube.

Using Slicers in Pivot Tables

I am going to use the same pivot table that I left off with in my last post and now I am going to add slicers to show you how they can make your life easier.

***Please note slicers are a new feature in Excel 2010 and you will not be able to use them on older versions***

To insert a slicer is very simple, while having selected a cell on your pivot table, go to the Insert tab and click on Slicer.

Then you will be prompted to select which field you want to use a slicer for:

I am going to select the first four fields: Date, Customer, Store, and Sales Rep. Once you’ve made your selections, click OK.  Now you have four different slicers that are on top of your pivot table:

This is of course not ideal, so the first thing you will want to do is move them. You can easily re-size the slicers as you see the current one I have selected for Sales Rep shows circles along the edges that I can use to re-size it.

First what I am going to do is insert a column into column A so that my pivot table pushes over into the next column. I will also insert a few rows above it to make room as well.

I am doing this so it is easier to move over a slicer to the left of the pivot table.

For slicers that have long filters (for example customer names), I prefer to put those above the pivot table, otherwise the names might get cut off. For shorter names, such as the three letter month abbreviations, those can go into the column to the left of the pivot table. Because they are short, they won’t need a big column to accommodate them. However, this is just my preference and you can put slicers wherever you think is most convenient.

I’ve re-arranged my slicers so the months are to the left of the pivot table and everything else is above it:

The slicer to the left of my pivot table looks fine, but the problem is the slicers at the top only show a couple items each, and would require me to scroll to find my selection. You may need to scroll, but there is a lot of empty space that can be used otherwise.

What I want to do is add another column in the slicer. If I select the Customer slicer, under the Options tab under the Slicer Tools section, on the right-hand side there is a field for columns. The default is set to 1, but if I change it to 2 my slicer now looks like this:

This is already a big improvement since now instead of seeing just two items I see four. I can add more columns but in this case without expanding my slicer horizontally it will truncate the names. You can stretch out the slicer as you see fit and adjust the columns accordingly. After adjusted my slicers all to be two columns, my pivot table and slicers now look like this;

If you are finding it hard to line up your slicers so they are even, select the slicer and under Slicer Tools and Options, click the Align button and check off Snap to Grid and Snap to Shape. Doing this will make it easier for your slicer to lock on to other slicers and make it easier to line them up. Do this for each slicer you are having issues lining up. Or you could select all your slicers (using ctrl) and apply the settings to all of them at once.

Now that the slicers are setup they are ready to use. Slicers effectively are filters in a pivot table, but the key difference is their ease of use for any user.

Whatever options I want to filter by I can just click on in the individual slicers. In the below example I am going to select all the sales to Customer ABC and Store 1 for Rep 01. My selections below reflect these selections and now my data table has filtered this data out:

If I want to remove any filters then all I can just click on the filter icon and the red x in the top right corner of the filter. This will reset the selections for that slicer.

Based on my selections I cannot choose any option besides Oct for the Date slicer. This is because based on the criteria I have selected in the other slicers there are no other months that are available. The unavailable selections are indicated by the faded light blue selections.