Are you stuck doing boring Zoom calls or have a boss that likes to say the same phrases over and over? I’ve got a great way for you to help pass the time at the office and make your meetings more interesting: play Corporate Bingo with your co-workers. This Excel-based template is easy to use and you can quickly hide it if necessary.
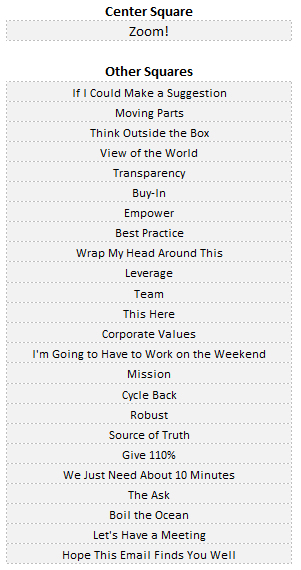
If you’ve played Bingo before then you know how to play this game as it works the same way. There are 24 squares (plus the free center square). To win, you need to mark off a row, column, or diagonal set of spaces. Although I have set the squares up as phrases, you could also use this Bingo card for actions. To the left of the Bingo card is where you can enter the values you want to use. I’ve already populated some of my most dreaded corporate phrases/words for you:
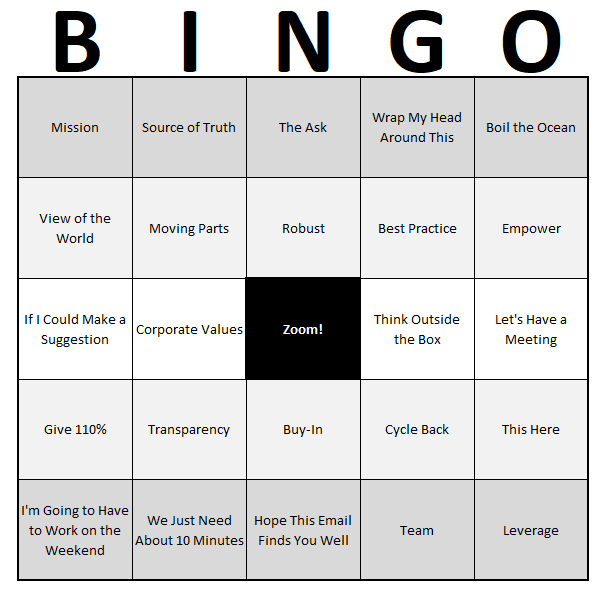
You will need to enter something for the center square as well as the others. When you make a new game, the other squares will be randomized. Here’s how the board looks:
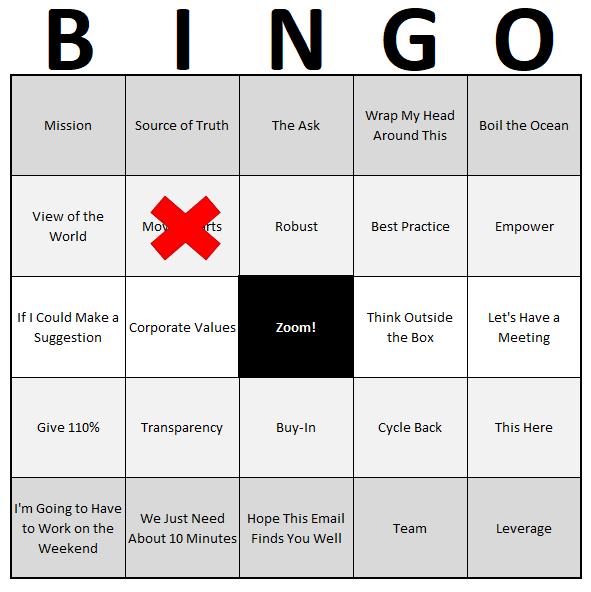
If you’re in your meeting and someone says one of these terms, what you can do is double-click on the cells, and then there will be a red ‘X’ that marks that spot.
Once you have a line, whether it is across, down, or diagonally, it will highlight in red:
If you make a mistake or want to create a new game, use CTRL+SHIFT+N and the board will re-populate.
The values and formulas on the board are password-protected. This is to prevent accidentally overwriting the values on there, since they are automatically randomized each time.
Hiding the sheet
I made this game easy to hide in case someone walks past your desk or you want to keep it discrete. Using the shortcut of CTRL+SHIFT+Z, you can quickly hide the sheet. And if the game is hidden, using the same shortcut will unhide it again for you. The one caveat is you need to ensure that the sheet names remain unchanged.
Although you can’t change the sheet names, you can change the name of the Excel file to something other than Bingo.
If you liked this post on Corporate Bingo, please give this site a like on Facebook and also be sure to check out some of the many templates that we have available for download. You can also follow us on Twitter and YouTube.
If you need to make an invoice and don’t want to spend money on some overpriced software, you can do so easily in Excel with this template. Not only can you customize it to how you want it to look and feel and produce a professional-looking invoice, but you can also track items, set prices based on customers and even have taxes calculated based on location codes.
Ultimately, it’s up to you how complex or simple you want it to be. Here’s how the template works:
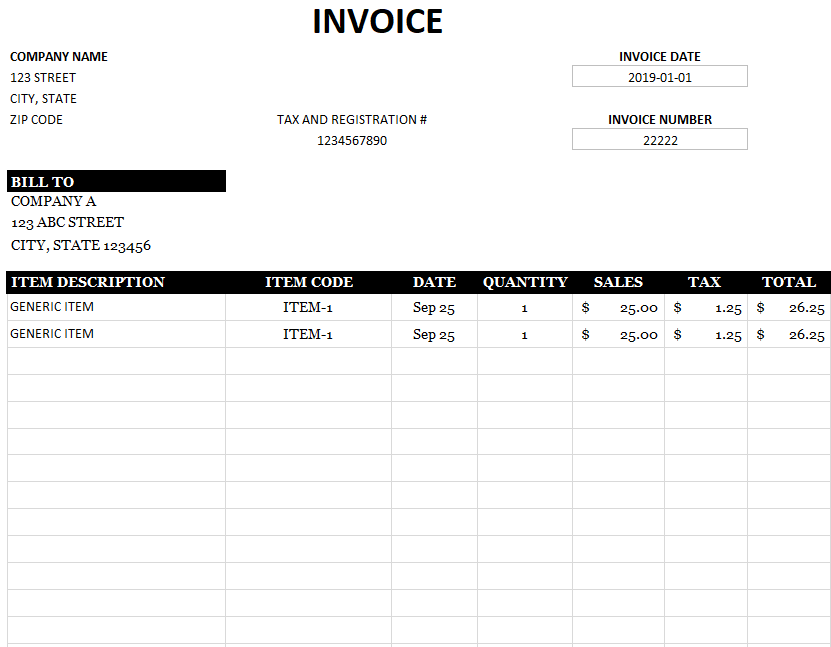
The invoice itself
Whether you want to add a logo, change the colors or add some information to the headers, you can have a lot of control over how your invoice looks. The key thing to remember here, however, is not to add or remove any columns or rows. If you need extra space, stretch out the rows or columns, but don’t add any new ones.
And if you need to move the invoice date and number fields, be sure to move them, not delete them or copy and paste. They’re named ranges and so it is important that they remain intact for the code to still work.
Setting up the invoice template
Before you get started and using the template, what you’ll want to do is to set up some items, customers, locations and rates. Unless you really want to start from scratch every time, which I wouldn’t recommend.
First up, start with the Locations tab. If you’re only selling to one part of the world, then just set up a generic location but you can add as many different ones as you need. This is key for ensuring that the correct tax amount is being calculated per customer.
Next up, go to the Customer tab where you’ll have a list of your different customers, including their addresses and location codes. It’s important to add the location codes first because on the customer tabs the locations are drop-down selections that are derived from the locations tab, this ensures that you only select from a location code that has already been created. This is important to ensure that you aren’t mapping to a location that hasn’t been set up, otherwise, you’ll get an error.
Set up all the customers you need. Then next, move over to the Rate tab. Here, you’ll want to set up your customers from columns F onward. On this tab, you will also create your different items and differentiate between products and services. You can create as many items as you want. There is a rate field (column D) when you specify your default rate.
In the columns for your different customers, you can specify a special rate per customer. For example, in the above example, ITEM-1 has a default price of $50. However, if Company A is selected as a customer, a rate of $25 will be applied. If Company B or C is selected, the default rate of $50 will apply since no special pricing has been made available for those customers.
Putting it all together – creating an invoice using the template
With all that set up, now you can go back to the invoice tab to create your own invoice.
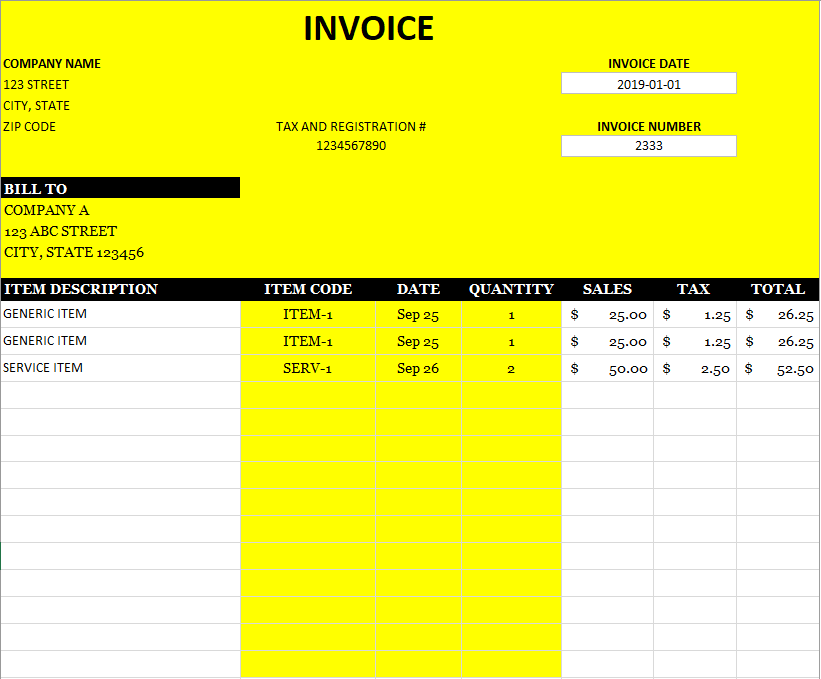
First, start with selecting your customer under the Bill To section. Enter the invoice date and invoice number.
Then, it’s a matter of selecting the items in column D, the date in column E and Quantity in column F (if it’s a service item, the quantity won’t matter, a value of 1 will be assumed). The remaining fields should auto-populate. You can edit everything that is in yellow. Anything not in yellow means that it you should NOT modify it (Note: the actual template will not show this highlighting):
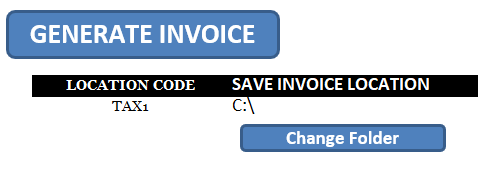
Once everything is good to go, you can click on the Generate Invoice button.
This will do two things:
Create a PDF of the invoice you just created and save it to the location specified, and
It will also add the invoice to the Invoice.List tab. This creates a ledger for you to track all the invoices that have been created. If an invoice number is already on there, it will not allow you to create a duplicate. It’s important that you do not delete the invoice number field if you’re changing the template around.
The Invoice.List tab will log all the relevant data from the invoice. This includes the number, date, when it was saved and by who, which folder, and even individual item sales.
Disclaimer
The goal of this template is to allow you to generate invoices as accurately as possible. It also helps you track all your invoices. However, it’s by no means a perfect solution as you could conceivably alter the data in the Invoice.List tab after the fact. What I’d recommend is password protecting the file or hiding the tab if it will be used by multiple users.
So if you choose to use this file, it’s just important to keep that in mind. By adding too many controls and preventing people from deleting or correcting items, it may end up being too much of a hassle. This template isn’t a substitute for accounting software and it’s intended to create and track invoices.
Please note it’s up to you to ensure that your invoice is accurate and correct. You should always double-check an invoice before sending it out.
Download
The invoice template is free to use although there is a limitation of 3 items per invoice. It will also have an ad in the ribbon. The full version is available here. It will remove the limitations, advertising, and the code for the VBA will be unlocked as well.
If you like this Blank Invoice Template, please give the site a like on Facebook. Also be sure to check out our templates section. You can also follow us on Twitter and YouTube.