
In this post, I am going to cover some commonly used date functions and show you how to do some basic date calculations in Excel.
Incrementing Dates by Days and Months
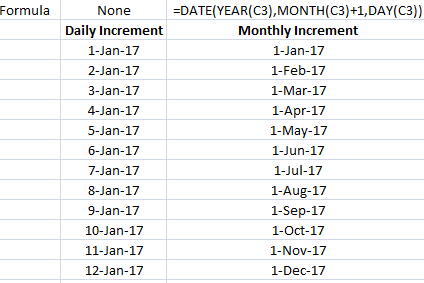
One of the more common date calculations in Excel is to increment your dates. If you want to increment a date by months, years, or days, then you can use the DATE function to do so. This function has three arguments: year, month, and date. If I have a date in cell C3 and I want to make cell C4 one month later, I would use the following formula:
=DATE(YEAR(C3),MONTH(C3)+1,DAY(C3))
For each of the year, month, and day arguments I used their individual functions. The YEAR function will take the year of the date specified, as the MONTH function will take the month, and the DAY function will take the specific day. For the DAY and YEAR functions I simply just referenced cell C3 since I want those values to remain the same. The MONTH function also took the same value from cell C3, however, I added +1 to it as well to increment the value by one month.
If I want to just increment by day, then I can just enter a starting date and drag that value down, and Excel’s autofill will automatically increment the values by one day. Here’s a comparison of the daily increment (where no formula is necessary) and the monthly increment, where I use the formula noted above:
Now, there is another way, an even simpler way, just by using Excel’s autofill feature that I can increment by month. If I enter my starting date in cell B3 and pull it down using the fill handle, Excel will increment by day. However, if I select cell B3 and pull down the fill handle while also holding down the right-click button, it gives me the option to select how I want to increment – including fill days, weekdays, months, and years.
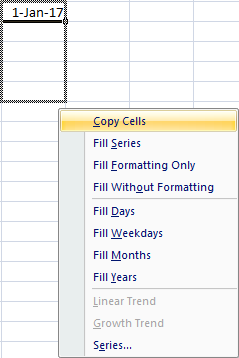
This way you can ensure Excel increments as you like. If you just use the fill handle without the right-click button you don’t get these options and Excel fills in the data how it thinks makes sense. Interesting to note that if you fill in cell B4 with the next month, and then select cells B3:B4 and then use the fill handle, then Excel has figured out you want to increment by months and doesn’t increment by days anymore. The more of a pattern you show Excel, the more likely it will know what you are trying to do.
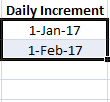
In the above picture if I now double click the fill handle my daily increment will become monthly since I have selected two points in my series. And since the two points have a monthly interval, Excel assumes I want the rest of the series to also have monthly intervals as well. The result becomes this:

You may wonder what the point would be of using the date function in the formula above if you can just use the fill handle since it is faster and easier. The main benefit of using a formula is if you don’t want to have to use the fill handle all the time. If you just need to set up your dates one time, then certainly the fill handle makes sense. But if you are working with a large data set that you will continually add to, you might find it a bit easier to have a formula there as opposed to using the fill handle each time and making sure it is incrementing correctly.
Calculating the Difference From/To Today
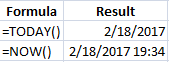
If you want to include today’s date in your calculations, you can use the TODAY() or NOW()functions. These functions have no arguments and you just enter them with both parentheses. This will generate today’s date. The difference between the two functions is the NOW() function also includes the time. But for the purpose of calculating the difference in days, either one will do the job.
Alternatively, you can use the shortcut CTRL+; which will plug in today’s date. If you want the date to update every time you open the spreadsheet then you are better off using the functions. If you want to do a one-time insertion of the current date never to change later, then the shortcut will do. It is no different than just entering the date yourself.
End of Month Calculations
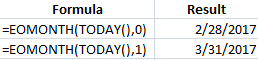
Suppose I wanted to not calculate the number of days from today, but the end of the month. What I could use is the EOMONTH function. This has two arguments – start date, and months. If I wanted to use the end of the current month, I would enter the following formula:
=EOMONTH(TODAY(),0)
If I wanted the end of next month, then I would change the 0 to a 1:
=EOMONTH(TODAY(),1)
The months argument just tells Excel how many months ahead to go. Whether you change the months argument or alter the start date to get to a later month end value, it doesn’t matter, both methods can get you to the desired result.
Calculating Workdays
Up until now, I’ve gone over how to calculate the difference in days. But suppose I wanted to calculate only working days. To do this you can use the NETWORKDAYS function which will take the starting date, ending date, and calculate how many workdays fall in between. To be more accurate you could also include a list of holidays into the function (which you will have to populate).

In the above example, I selected Jan 2 and 3rd as holidays so as a result, the NETWORKDAYS function with holidays has two days fewer than the function without holidays since those days both fall within the date range. Without a list of holidays, the NETWORKDAYS function effectively calculates weekdays since it would only ignore weekends. Also note that in the argument for holidays, do not include any text fields such as a header for holidays. If my range included the header then it would return a #VALUE error.
A similar function, WORKDAY takes the starting date, and you select how many workdays you want to advance by, and it will return a date result for the next working day after the days you specified. Again, you can list the holidays to ensure a more accurate calculation.

If you don’t use holidays then both functions (NETWORKDAYS and WORKDAY) will not adjust for them. However, both functions will recognize and skip over weekends and so if you leave holidays blank they effectively just look at every weekday.
Calculating Weeks, Months, Years
If I wanted to do date calculations in Excel to show the difference between two dates in weeks, what I could do is use the WEEKNUM function and then use my date as the argument for that function. Once I calculate this for both dates then I just calculate the difference. This strictly looks at the week of the year, so it won’t take into account whether one date is a Friday and the other a Monday.
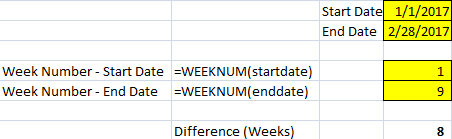
And if you wanted to you would be better off dividing the difference in dates by 7 to get fractional weeks.
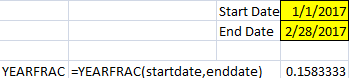
For months you can do the same thing, except using the MONTH function which will yield a result from 1 to 12. The YEAR function will do the same as the month function, give you the year of the specified date, which you then can use in your calculations to calculate the change in years. You can also use the YEARFRAC function if you wanted to calculate the difference in fractions of a year, to give you a more specific result when calculating the difference in years.
Formatting Dates
In addition to just doing date calculations in Excel, it’s important that your dates are also formatted properly. You can format dates so they display exactly how you like right through the format cells option. The easiest way to do that is to go to the cell formatting (right-click format cells, or click ctrl+1), and select the CUSTOM category.
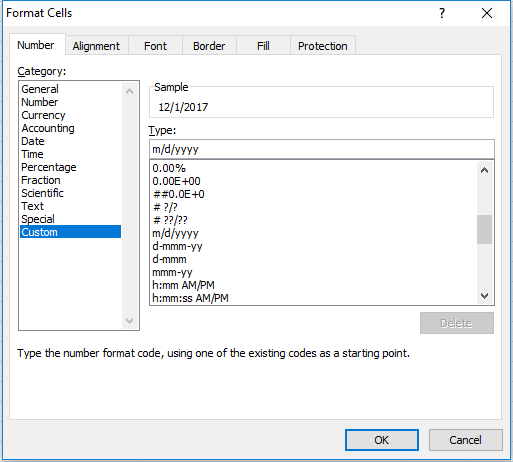
If you want month/day/year (which it may already be set to) the formatting is just m/d/yyyy. But what if I didn’t want to show all four numbers for the year, just the last two? Then I would set it to m/d/yy. You can flip the d and the m around so it is d/m instead of m/d and then you have day/month/year. If you use two d’s rather than one you will get a 0 if you are in single digits for the day. For instance, instead of 1/1, you could get 01/01. You will notice the changes in the sample box above as you change your custom category.
Here is a quick summary of the use of letters and what results they will yield:
- m or d: will use 1, 2, 3, etc.
- dd or mm: will use 01, 02, 03, etc.
- ddd or mmm: will spell out the abbreviation (e.g. ‘Mon’ for Monday, or ‘Nov’ for November)
- dddd or mmmm: will spell out the entire day or month (e.g. Monday, November)
- y or yy: will use the last two digits of the year.
- yyy or anything more: will use the full four digits of the year.
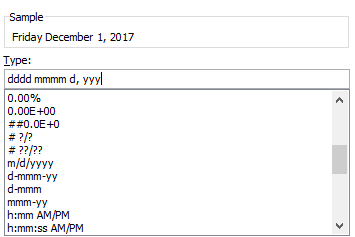
If I wanted to use a formal date that showed the day and month spelled out, followed by the numerical day, a comma, and the year, I would use the following format:
dddd mmmm d, yyy
If you liked this post on How to Do Date Calculations in Excel (and Format Them), please give this site a like on Facebook and also be sure to check out some of the many templates that we have available for download. You can also follow us on Twitter and YouTube.
[…] If you’re interested in looking how to format dates, check out this post. […]
[…] enter in these columns and these deadlines could be annual or monthly. You could even use various date functions to help create recurring deadlines here as […]
[…] just looking for the difference in dates, including months, days, or years, then refer to this post. But if you need time differences, keep […]