t account excel template spreadsheet

T-Account Template

A good way to plan and organize your journal entries is to use t accounts. This template will allow you to setup and manage multiple accounts and see the impact of all your entries. It’s a quick way to plan and hopefully prevent any mistakes before they happen.

Download Options

Free version: Download Here For the full version (no ads/workbook locks) click on the following button:
 

About This Template

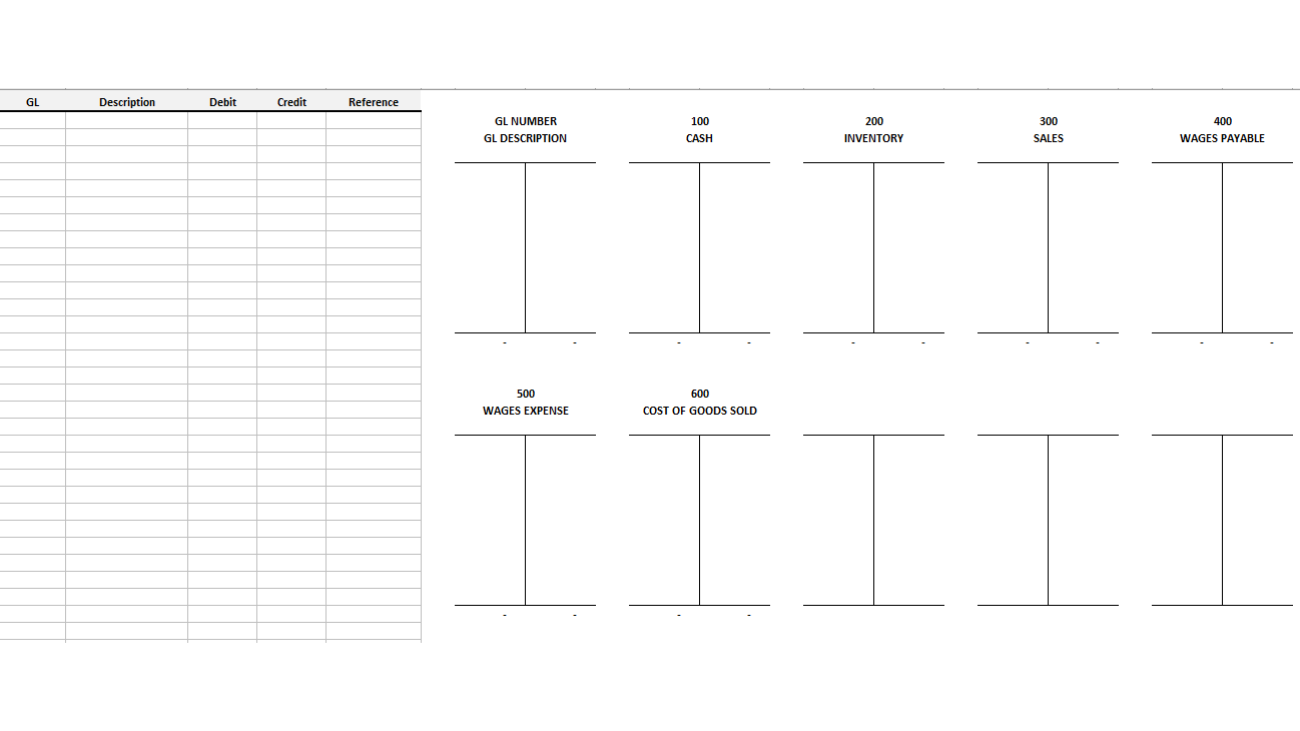
This template allows you to easily setup t-accounts and make entries on the left hand side of the spreadsheet and see the affect on the related t-accounts on the right hand side.
There are placeholders for 10 different t-accounts with the first row specifying the GL number (this will need to match the GL column in the entries to correctly update the t-account), the GL description (for reference only and not needed for calculations), and if there is an opening debit or credit balance for the account. Once setup, any entries you enter will automatically update the t-account which will show the updated balance as well.
Below is how this looks with the sample data in the template. Feel free to test out the template with the embedded Excel file below
prepaid expenses template excel spreadsheet

Prepaid Expenses Template

If you’ve got several prepaid expenses to track then this template can help you manage and reconcile that. You can select different start dates and durations and can easily modify the template to adjust it to your needs and add more items to it.

How This Template Works

This template will help you track and amortize prepaid expenses. If you’re looking for an amortization template, however, check this post out.

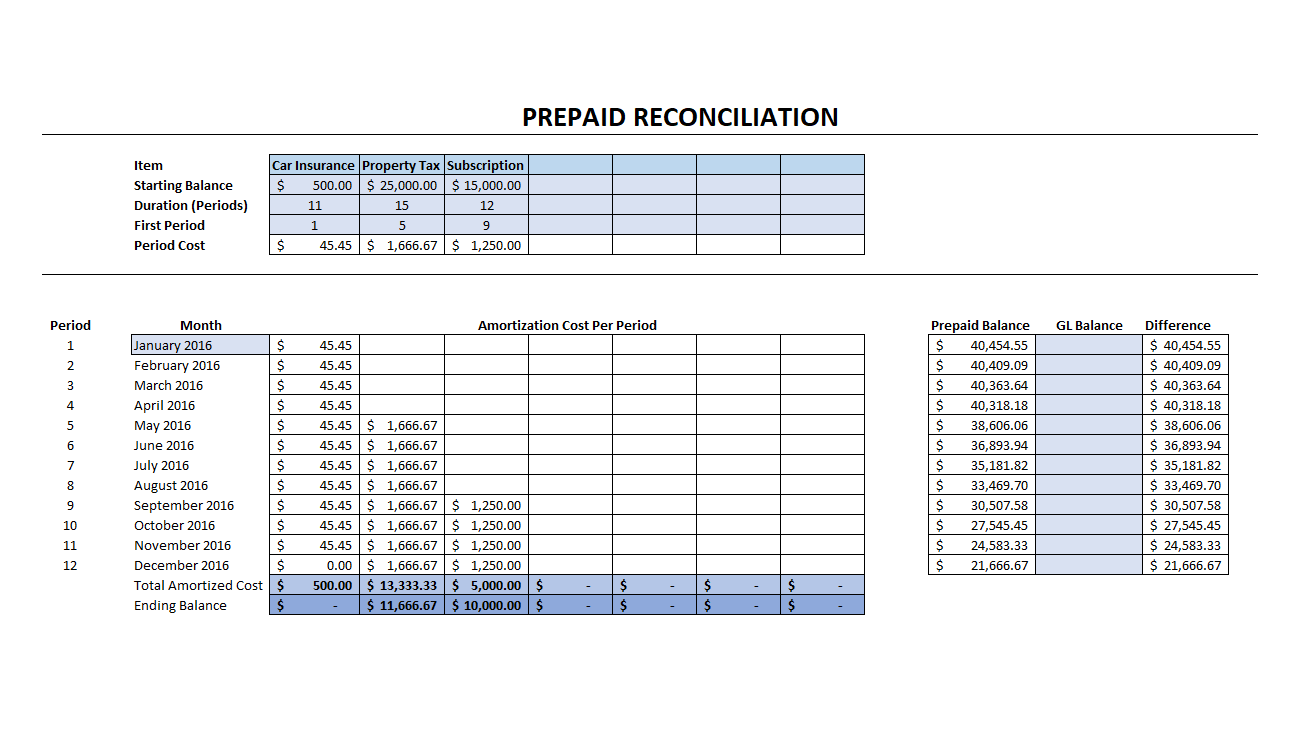
I have some sample data entered into it and the top section is where you can enter the details. This includes the prepaid item, the starting balance (or the total expense), the number of periods you want to expense it over, and the first period you want to start expensing it from. You can add additional items and just copy the formulas over.

The first month where I’ve entered is January 2024. However,  you can change that  to a different month and the other months will automatically increment. This spreadsheet covers 24 periods or two years as some expenses could possibly stretch longer than just one year. However, you can stretch this to more than 24 periods by again copying the formulas further down.

The section on the right allows you to enter your general ledger (GL) balance. Here you will see any variance between what that amount is and what the prepaid balance should be. This will help you to reconcile your prepaids and identify which items you still need to account for.

The prepaid expenses template is flexible and should be easy to change as needed. There is no coding in this template as it’s entirely driven by formulas. If you can copy formulas, you can easily modify this file as needed to suit your needs.

Another template that might help in your reconciliations is my  t-account template which can help plan your entries.

If you have any feedback on this template please feel free to leave a comment!

Download Options

Free version: Download Here. The free version is limited to three prepaid items to track and the sheet is locked.

For the full version (no restrictions/ads/worksheet locks) click on the following button:

aar

Create an Accounts Receivable Customer Statement

TEMPLATE – AR STATEMENT

This is a template designed for creating customer statements from invoice and customer data. Some accounting software (specifically some ERPs) are not the most user-friendly and creating an easy-to-use statement that is customizable is difficult to say the least.

My template has three tabs.

One is for customer data, and this should be a data dump of all your customer names and address information. This will be used to generate the address on the statement for the customer.

The next tab is the invoice data. This should contain all the outstanding, unpaid accounts receivable invoices.

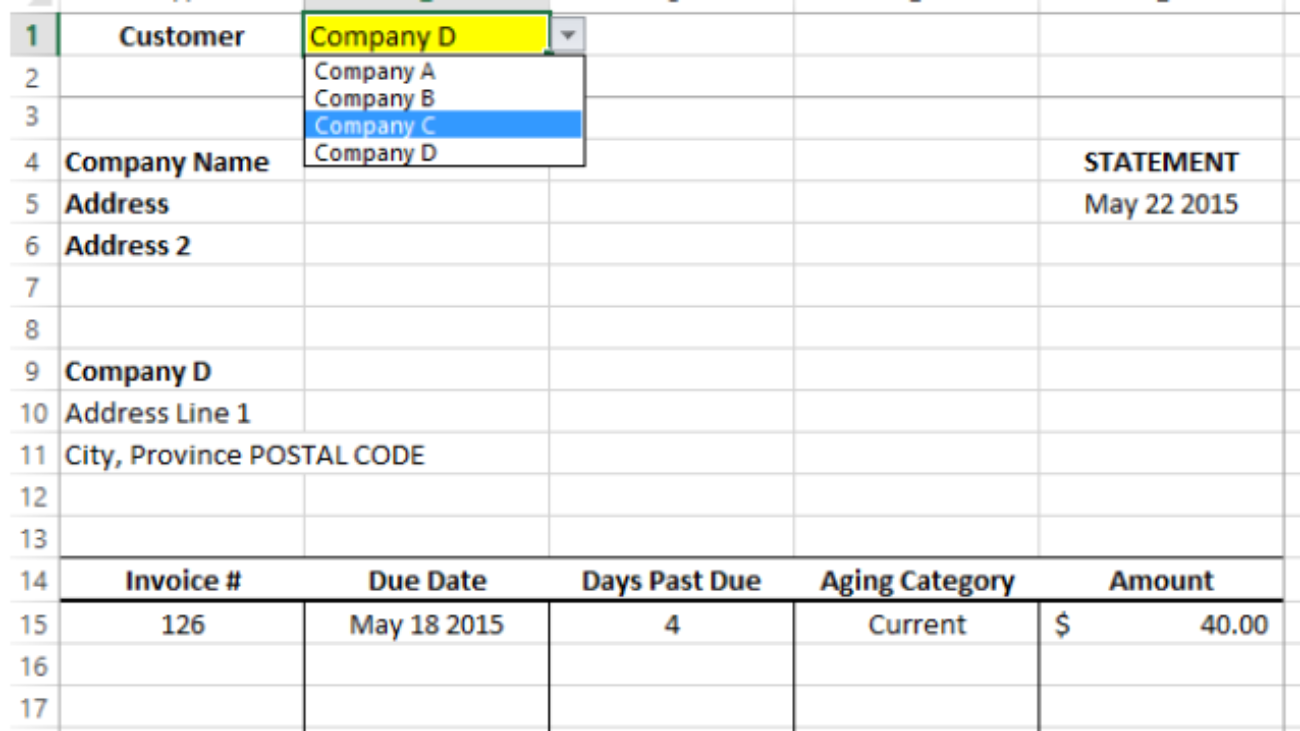
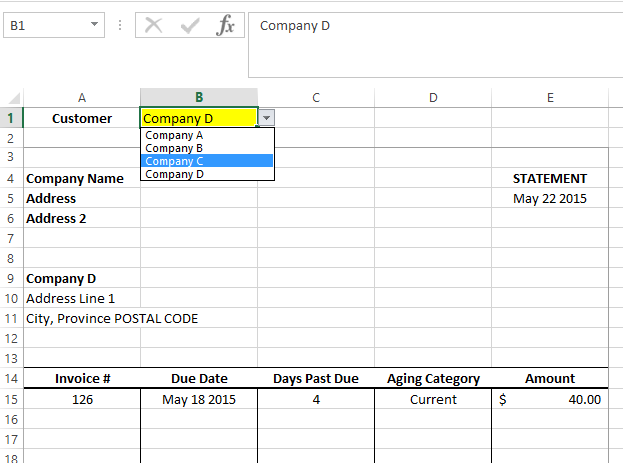
Once all the data is populated on those two tabs, you can go to the statement tab. In cell B1 you can select from a list of customers – this is tied to the customer data tab. Select the customer you want, and the address and outstanding invoices will be updated.

In cells A4 to A6 is where you would put your company information as well as adding any logo or customization. At the bottom of the page there is a summary of the outstanding invoices by aging category as well as the total outstanding.

The template has some sample data for you to test and see how it works.